Monday, November 28, 2011

A Season Approaches

This weekend I happened to be in the city, and I happened to need to run an errand off of 5th Avenue. I also happened to forget that this was the opening weekend for all of the holiday windows and that 5th Avenue would be mobbed with people! I figured it out pretty quickly though when I exited the subway only to see a wall of heads in the direction I needed to go. So, I braved the sea of camera wielding, bag laden tourists and I promise I didn't make a single snide remark.... out loud.


While navigating closer to my destination I made my way in front of Bergdorf Goodman's, and what did I see? Materially thematic window displays! Wood, paper, tile- oooh very nice! As I kept hustling by it did finally occur to me that I could pull out my camera too and snap a few shots to share with everyone. Keep in mind it was a last minute thought, composed on my camera phone and in a huge crowd, so they aren't the clearest of shots. I had also passed the wood display and wasn't going to fight the current to get a shot, sorry about that.

Here is the paper window- absolutely every surface is covered with paper. These are designers after my own heart.

Progressing further down the Avenue I bumped into this window! The Statue of Liberty with, what I believe is, a Jelly Belly bean dress standing in front of paper artist, Robert Sabuda's cityscape.

Imag0574
And my final salute to the afternoon came by seeing my first Christmas tree stand on the Upper West Side. These stands always ring in the season for me with their cheery lights and delicious smell of evergreen.

I'll leave you with this. If you are getting into the holiday spirit and are beginning to think about gift giving, perhaps you might like to take a gander at my store. Today is the last day of my 20% off sale (coupon code DUTHANKS) and it's the last sale of the year. Thankfully there has been some buzz for shopping at small businesses this year, feel free to bring the buzz over to my shop, The Delicate Utility

Last time I promised a story on the BAT CAT gang. Don't worry, that will be next time.

Don't just en-joy, but bring joy, to the season!

Susan


Tuesday, November 15, 2011

The Studio

Life after moving is far better than life during moving.

This is what I'm trying to remind myself of when I get frustrated searching in vain for items at home or in the studio, or when I get led on a tangent by having the light diminish in the kitchen at 4:30pm so that I'm straining my eyes to see my laptop and then I think, I might as well just go and hang the light above the table to remedy the situation, but then I remember that we couldn't find the spare light bulb last time we tried to hang it, so I go searching in the hall closet, for said bulb,  only to then reorganize the entire closet as I attempt to get to the box I think might contain the lightbulb but instead has the c-hook which I could use to hang the lamp. Alas, no bulb, so no hung light fixture, and an hour and a half later I just bring my laptop to the living room where we do have adequate lighting. At least the closet got organized.

Moving home and studio in the same month is not the ideal but that's what happened around here. In honor of the new spaces I've included some shots of the studio to give you a sense of where I'm hanging out (when I can get there) these days. Having an open studio within just weeks of moving in gave me the incentive to get some work up on the walls. My studio is in a Chashama work space, and they do a great job of supporting and organizing artists- I like them a lot.

Img_4384
My mannequin greeters. I feel like they need names. Any suggestions?

Img_4380
Looking towards the back wall and my work table (the messy end of the room)

Torsos
The torso line up, it's so nice to see them hanging together again!

Img_4377
The front wall, opposite of my greeters

Img_4392

The view from my work desk

The space is a great size for me currently and has plenty of room for me to create and store my larger pieces, something our old apartment couldn't really provide. It will be interesting to see how the work progresses now that I have more room to move around. 

Next time I'll tell you about my new pals the BAT Cat Gang- I'm a fan and I'm sure you'll get a kick out of them too. Thanks for visiting my space with me!


Monday, October 24, 2011

Gloria !, !!, !!!

Hi folks-

It's been another busy week! We had open studios last Friday night at the Brooklyn Army Terminal and had a great turn out. It's always fun to meet new art lovers and it helps me keep my descriptive skills fresh clear while explaining my work. Another big thanks to Chashama for making the night and my studio space possible!

In other new I've got a few new items I'm ready to add to the etsy.com shop. I've been working away at getting some larger journals/sketchbooks posted and three large Gloria III's in red, yellow and brown combinations will be added.
Marigold Yellow Sheep skin with Sienna Brown Leather Straps

Cherry red leather- oh so sweet!

Sienna brown and plum- a soothing combo

 I'm also throwing in a medium Gloria II.


Next week I hope to have my brand new Sherman refillable pocket journal added as well as a small refillable Gloria. Stay tuned for more additions!

Wednesday, October 12, 2011

Fly Away Bluebirds!

The robe is nearing its pre-fitting finish, the props are purchased for Friday, and the new bluebirds I'm submitting for purchasing consideration by NYU Langone Medical Center are done! Phew. The medical center put out a call for artwork to be considered for public spaces and patient rooms. Most of my 2-D work is intimate in scale so I'm submitting work primarily for the consideration of patient and examining rooms. The icon in the work, the bluebird of happiness, represents hope, good health, renewals and a host of other positive sentiments. Let's hope they each get to find a new home in the hospital and bring some happiness to visitors.


Tuesday, October 11, 2011

Still in the breaker waves

So I thought this week might bring a bit of reprieve from the hectic pace as of late... I was very wrong! But, because I thought it would be calm I took on a few extra projects, for which I am shaking my head at now. Alas, it is the season for craziness. I am not a fan of winter, but man, I would love to just hibernate right now.

Enough. On to the work. The film that I prepared the books for (see the last few entries) will be shooting at our apartment this Friday. Yikes! The entire apartment has been serving as my studio while I've been working on these projects and it's a mess! I have a lot of cleaning to do before then! I'm also making two robe costumes for the film and my sewing supplies is everywhere. Robe number 1 was finished about a week ago and I'm hustling to get number 2 done for a fitting with the actor this Friday.

Also, put it on your calendars and come on down- I'll be selling my books and artwork at the DeKalb Market in downtown Brooklyn this Saturday and Sunday (Oct. 15&16) from 11-7pm. Check out the market site here.

Here's a look at #1 for the male actor.


Friday, October 7, 2011

"Good Straw," says crow.


I had the honor of creating a piece of artwork inspired by my good friend Daniel Nayeri's brand spankn' new book, "Straw House, Wood House, Brick House, Blow," which launches in stores this month.  Daniel's book is a collection of four novellas for young adults (and adults who like to feel young). For the launch party, his ever so delightful wife,  Alex, organized a bunch of hooligan artists to create a variety of pieces based on the book. My contribution is below. Here's the link to more information on Daniel's book which is published by Candlewick Press.

There's a scene in Straw House where the straw man, Sunny, is asleep and his arch nemesis, Crow, lands on his shoulder, sticks his head into Sunny's ear and starts picking away. Daniel's description paints a much better word picture, but here's the pencil picture that kept popping into my mind as I reread that passage over and over.

"Good Straw," says Crow.2011
9x12 x matted to 16x20
graphite & acrylic on illustration board


I hemmed and cawed , I mean hawed, over a few different ideas but landed on sticking with the bird silhouette and graphite pencil drawings that I've been doing lately.

Here are a few of my first idea sketches...


.... and the drawing before I added Crow.

Wednesday, October 5, 2011

Gee, Gosh & Golly Alice! How to Add 75 Years to a Book.

Here's another project from the ocean of work...

The second book prop for the film (see yesterday's post for details) was a copy of Alice in Wonderland and Through the Looking Glass. The book needed to look vintage, have John Tenniel's illustrations and to have an extra page added into the book which corresponds with the film. 

My first task was to find a copy of the book that had a few blank pages in it. These are usually found in hard back books at the very back. I flipped through a few copies of paperbacks but they rarely have them. I thought I hit gold when I found a great used version on Amazon only to receive an e-mail two days later explaining that the copy of the book they sold me is no longer available- blast. That sent me on a hunt around town. Oddly enough I actually found what I needed at Barnes and Noble. The sales guys were even nice enough to open the cellophane cover so I could confirm that there were empty pages. However, the pink and gold embossed leather cover didn't scream early edition to me. 


So, I pulled out my magic vintage wand and turned the book into this!


Wand aside, here's how I did it....


I knew I was going to need book cloth for the cover but I had a hard time sourcing the right color  so I had to make my own. There was A LOT of trial and error in this one. First I started with a muslin that had a double sided adhesive that I picked up at the fabric store, no go. The adhesive only mildly stuck and pulled the paper backing away from the fabric. So, a run to a part of Queens I've never been to before and the craft store AC Moore to get heat n' bond ultra hold. Now that ought to stick! 

Step 1. iron a heavy tissue paper, no, I'm not OCD, you have to get the wrinkles out otherwise they show up on the fabric! Make sure it's heavy too. I tried the regular gift wrapping version and it was too flimsy.


2. Cut a piece of the heat and bond to the size you need and adhere it to the paper. Then peal the paper backing off to expose the other side of adhesive.

3. Lay your cloth, I used a light cotton, (which should have already been ironed and washed if possible) on top of the adhesive. Press with the iron for about 8 sec. in each spot. I still had a little trouble with the heat n' bond pulling the tissue paper backing and creating wrinkles, but I think if I had used a heavier fabric this wouldn't have happened.

4. Voila' you have book cloth. Now comes the hard part, covering the book!

P.S. Sorry I don't have photos for all these steps. 

I worked on this in stages so that I didn't have odd globs of YES! paste getting into areas where they were forbidden. Wax paper is also a life saver when you do this type of thing.

Back to the project, I cut my book cloth down to be about 1" larger than the book on all sides when it laid open. I pasted one cover at a time and let it dry for a bit. Then, I mitered the corners and pasted them in  place. Lastly I tackled the spine. My nerves were a bit raw with this one. If I screwed this part up I'd have to start all over.

I cut small slits at the edges of my cloth on either side of the spine. I tested the depth of the cut by tucking the flap into the spine to see if it would stick up. Once I thought I had the cut right, I pasted, and then used a plethora of skinny tools to shove it down around the spine as neatly as possible.


Here's the end of that part.


Now, the extra page. Good thing I found a book with some empty pages because I used up every last one trying to get this right and then still had to utilize a page that only had text on one side.

After first trying to use a photocopy and transfer pen with the text, and not getting good results (the paper was too thin and kept causing the transfer to bleed) I then had the not so difficult idea of just putting it through my printer... what do you know, the most basic and simple version worked. Too bad I didn't think of that first. Oh well, it worked out.

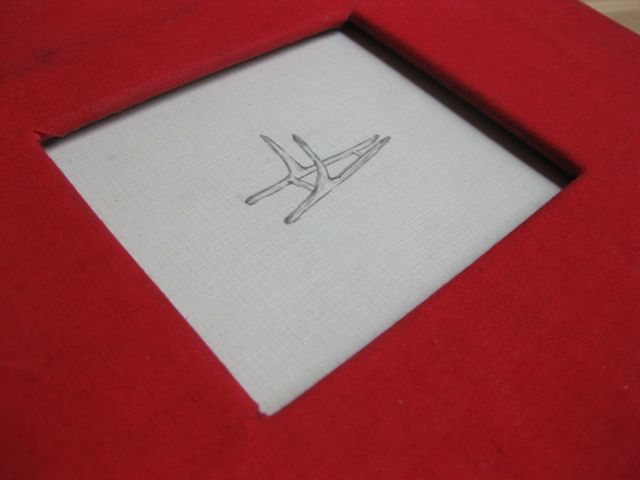
The last part was the front graphic. This took even more experimenting, but seeing as I don't have many photos to illustrate what worked and what didn't we'll go with the short version. I used an iron on transfer for light colored fabrics. I printed out the graphic in a mirror version on the transfer paper and then cut the page size down to fit the cover. Usually you don't want to have any extra transfer around your image area but it worked out okay this time because it gave the cover a slight gloss, which worked with the vintage feel.

The last step was to beat it up a bit. I sanded off a lot of the gold edging on the pages and then went after the edges of the cover to give them a look of having been dragged along shelves for many years.

There you have it. Instead of a face lift- it got beat up. Poor book. 


Emerging from a Tidal Wave of Work

Fall always seems to be a crazy season for me. Considering that much of my work revolves around the school season, this makes sense, but, it also seems like everyone not on the school track is convinced  that Fall is a great time for new beginnings, new projects, new events, NEW EVERYTHING.  Well, with all this new stuff of Fall I got pretty busy and hence haven't had an opportunity to blog. So, over the next week or so I'll give you a recap of a few of the projects that I've been up to and give you a nod towards what's coming next.

First, the film. My hubby is a partner in a film company, Almond Tree Films. He and the director have collaborated on  three projects together and this new film is their fourth. Keeping it in the family, I was asked to do some prop design and costumes for the feature that started filming about 2 weeks ago. It was very tight deadline work and there's still a few more things coming up. Here's a look at one project.


The film, is inspired loosely by a Korean Folk Tale called the Woodcutter and the Nymph. They asked an illustrator, Hannah Lee,  to make a few spreads and for me to bind them into a book. Above is the finished product. It needed to have a worn appearance so after I was finished, I roughed it up a bit with some sandpaper and charcoal.


The cover has a "peek a boo" window that features the illustration on the cover page.


The  project presented quite a few challenges. I couldn't get the actual pages until 2.5 days before the book was due. I also didn't know the final dimensions of the pages until a few days before that! It made planning ahead quite the feat! The pages delivered were 8.5 x 11 with a minimal margin... that's not an easy page to bind. It would have to be stab bound and tabs were going to be necessary.


I headed to Sam Flax art store and picked up a natural unryu paper. I cut strips 11 x 2" and carefully adhered them to each individual page, as close to the illustration as a I could get, with Sobo glue.


The tabs needed to be narrow enough to not cover the images at all but wide enough to allow the page to turn smoothly once they were bound.


Here's a closer shot. I also added a folded paper spacer to add a bit more bulk under the pages so that   the cover would be the right height.


Another shot of the front window.


For the binding I chose a Noble binding stitch. The book needed to look old and worn so this added a good touch.


I wrapped the ends of the pages with the same paper I used as an end paper on the interior of the covers. This gives a cleaner appearance and also protects the individual pages.

Well, that's one project. I'll share another tomorrow!


Monday, August 29, 2011

Meet Peter/Paul, Louis & James

Three new lines of journals have been christened and added to the etsy shop today. I once knew a wonderful Irene, however, after this weekend's run-in with the storm, I'm sorry to say that name will never grace one of my journals. So, let me introduce you to the new additions that have been added.
Meet "Peter, Paul and Pocket": a pocket sized (in numerous colors) journal with its own pocket that can stash your metro card, coffee money or any other small necessities for your day. A great little piece to keep you collected and organized. http://www.etsy.com/listing/80606842/blank-leather-journal-with-exterior

Next in the line up, "James", the rugged brother to the Gloria. Cut from a hide that has been distressed, this leather is not for the faint of heart. You may get your vampire on and find yourself feeling drawn to sink your teeth into this journal with its rich, thick, savory scent. Stylish, light and functional, these handy journals/mini sketchbooks are suited for every urban cowhand. http://www.etsy.com/listing/80601134/brown-leather-journal-blank-pocket-sized...

And last but not least, named after a clever renaissance man, the "Louis."  "The Louis" is a journal for the true renaissance individual. Record notes for your next play, invention or simply the grocery list. Cut from a rich, rough and tumbled leather cowhide, one sniff makes you feel the urge to start gnawing on the edges of this notebook. Please don't, it's not waterproofed.
Featuring two signatures (sewn sections) of 60 pages each, 120 all together (or 240 if you count front to back). The pages are ruled with a light blue to keep you in line (no margin), and features a slightly embossed line, for tactile enjoyment. For all you multi-taskers: the two signature design allows you to work in two portions of the journal at the same time, while still keeping your topics or projects clearly organized. Also handy, is the fact that you can fold the journal back on itself to make it easy for taking notes in small elbow spaces. The design also allows the book to lie completely flat when opened.
A hand-stitched lace wraps around the cover and tucks neatly under itself to keep your pages safe and secure.http://www.etsy.com/listing/80602300/leather-journal-lined-cedar-red-brown

All available for order AND customization at www.thedelicateutility.etsy.com